
As we go deep into Lightning Web Components, you’ll encounter lifecycle hooks in LWC—one of the most powerful tools that gives us control over the various stages in a component’s lifecycle. You may have come across similar concepts in React or Angular. In LWC, lifecycle hooks allow you to tap into critical moments when your component is created, rendered, or removed. Lets dive into the details.

Table of Contents
Lightning Web Components lifecycle methods
Lightning Web Components (LWC) follows a structured lifecycle controlled by the LWC framework. This lifecycle includes creating components, inserting them into the Document Object Model (DOM), rendering them for display, and eventually removing them from the DOM when they’re no longer needed. Additionally, the framework continuously monitors the components for changes to properties, ensuring the interface updates accordingly when the underlying data changes.
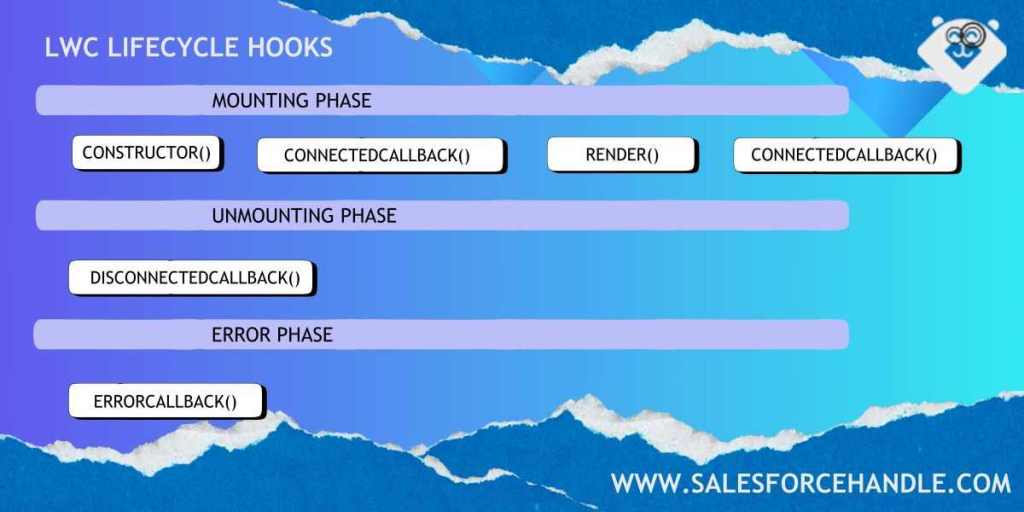
A lifecycle hook is a callback method that is invoked at a specific phase of a component instance’s lifecycle. Following are the lifecycle hooks in LWC:
- constructor()
- connectedCallback()
- renderedCallback()
- disconnectedCallback()
- errorCallback()
By the end of this post, you’ll grasp the importance of each hook, learn when to apply them, and gain valuable insights on how to modify your component’s behavior at various stages of its lifecycle.
Lifecycle hooks in LWC
Note : The render is not technically a hook but a protected method on the lightning element class which we would dig deeper in upcoming chapters.
Mounting Phase
1. constructor() in LWC
Key points
- This hook is invoked when a component instance is created but before it’s added to the DOM.
- This is the very first method that gets executed when a component is initialized.
- You have to call
super()inside this hook. - You can access the host element using
this.template. - The hook flows from Parent to Child component.
- The child elements are yet not created and hereby wont be accessible in the component body.
- We don’t add attributes to the host element in the constructor.
When to Use It
- Use constructor() when you need to set up initial properties, state, or data that doesn’t rely on the DOM.
- This is a great place for initializing class variables or preparing component-level data that can be used in other hooks.
Example | MyComponent.js
import {  LightningElement } from 'lwc';

export default class MyComponent extends LightningElement {
    constructor() {
        super();
        this.message = 'Hello from constructor!';
        console.log('Component is being constructed.');
    }
}
In the example above, the message is set in the constructor, and a log message indicates the component’s creation. Since constructor() runs before the component enters the DOM, you won’t be able to interact with any rendered elements here. Think of it as your setup phase.
2. connectedCallback() in LWC
Key points
- This hook is triggered when the element is inserted into the DOM.
- This is where your component gets attached to the page and is now part of the DOM tree.
- The hook flows from Parent to Child component.
- The child elements are still not created are not accessible in the component body.
- You can access the host element using
this.template.
When to Use It
- This hook is perfect for fetching data, setup caches, add event listeners (such as publish-subscribe events), or initializing the logic that needs to run once the component is fully mounted in the DOM.
- If you need to call a backend service to populate data (connect to APIs) or initialize any services that require DOM presence, this is your hook.
When NOT to Use It
We should not use connectedCallback() to change the state of a component, such as loading values or setting properties.
Example | MyComponent.js
import { LightningElement } from 'lwc';export default class MyComponent extends LightningElement {
connectedCallback() {
console.log('Component is now part of the DOM');
// You can now fetch data or set DOM-related actions
}
}
In this hook, your component is now part of the DOM, meaning you can interact with elements, fetch data, or even add event listeners. This is where you begin DOM-related logic, but keep in mind that the component might not be fully rendered yet.
3. renderedCallback() in LWC
Key points
- This method is invoked after the component has rendered its content, or the rendering completed.
- The hook flows from Child to Parent component.
- This hook runs after every render cycle, such that if the component’s data changes, it will rerun this method after re-rendering the DOM.
- It can run multiple times during a component’s lifecycle as and when the DOM updates. Placing performance-heavy code here can cause the component to be sluggish.
- When the component re-renders, all the expressions used in the template are re-evaluated frequently,
When to Use It
- Use this hook when you need to perform post-rendering DOM manipulation or update UI elements after the component has been painted on the screen.
- This is also useful for calculating layout sizes or setting up third-party libraries that depend on elements being fully rendered.
When NOT to Use It
- We should not use this hook to change the state or update a property of the component.
- We should not update a wire adapter configuration as it can result in an infinite loop.
Example | MyComponent.js
import { LightningElement } from 'lwc';export default class MyComponent extends LightningElement {
renderedCallback() {
console.log('Component has been rendered');
// Perform post-render logic, like DOM manipulation
}
}
Best Practices:
Make sure to implement checks to prevent redundant or inefficient updates in the renderedCallback. A common pattern is to use a flag to ensure the hook’s logic runs only once:
import { LightningElement } from 'lwc';export default class MyComponent extends LightningElement {
isRendered = false;
renderedCallback() {
if (!this.isRendered) {
this.isRendered = true;
// Logic that should only run once after initial render
}
}
}
Unmounting Phase
The disconnectedCallback() method is called in the unmounting or removing phase.
4. disconnectedCallback() in LWC
Key points
- This hook is triggered when the component is removed from the DOM.
- Whether the component is being navigated away from or is destroyed, the disconnectedCallback() method will be called.
- The hook flows from Parent to Child component.
- This callback method is specific to LWC and not pertains to any HTML custom element specifications.
When to Use It
- Cleanup activities: This is where you remove any event listeners, clear timeouts, or perform any cleanup tasks that need to happen before the component is destroyed.
- Use this hook to prevent memory leaks by cleaning up resources that are no longer needed when the component is removed.
Example | MyComponent.js
import {  LightningElement } from 'lwc';

export default class MyComponent extends LightningElement {

interval
    connectedCallback() {
        window.addEventListener('resize', this.handleResize);

    }

    disconnectedCallback() {
// remove event listener and intervals to ensure no memory leak
         window.removeEventListener('resize', this.handleResize);
                    this.interval = window.setInterval()
        console.log('Component has been removed from the DOM');
    }

    handleResize() {
        console.log('Window resized');
                  window.clearInterval(this.interval)
    }
}
In this example, a resize event listener is added, and an interval is set in the connectedCallback().These are removed when the component is detached using the disconnectedCallback(). This ensures no memory leaks occur when the component is no longer in use.
Error Phase
5. errorCallback(error, stack) in LWC
Key points
- This hook is invoked when an error occurs in one of the callbacks of a descendant component.
- This lifecycle hook contains two arguments: error argument (an object), and the stack argument (a string).
- It acts like a catch block for your component’s sub-components, allowing you to handle and recover from errors gracefully.
- This callback method is specific to LWC and not pertains to any HTML custom element specifications.
When to Use It
- Error handling: Use this hook to log or display user-friendly error messages when something goes wrong within the component hierarchy.
- You can also leverage this hook to send error logs to external monitoring services, making it easier to troubleshoot issues in production.
Example | MyComponent.js
import { LightningElement } from 'lwc';export default class MyComponent extends LightningElement {
errorCallback(error, stack) {
console.error('Error occurred: ', error.message);
console.error('Stack trace: ', stack);
// You can show a user-friendly message or log the error to a service
}
}
Example | MyChildComponent.js
import {  LightningElement } from 'lwc';

export default class MyChildComponent extends LightningElement {

          connectedCallback(){
                   console.log('child component created!')
                   throw new Error(' loading of the the child comp has failed');
         }

}
This hook gives you an opportunity to either handle or report these errors, ensuring the parent component remains functional even when a sub-component has encountered an issue.
Render method in LWC
Render method is a method that informs the component, which template to load based on some conditions. It always returns a template reference.
Key points
- The render() method is a protected method on the
LightningElementclass. - It can be called after or before the
connectedCallback() - We call this method to update the UI.
- It is basically used to conditional render a component with a specific template.
When to prefer render over if:true/if:false ?
Though both of them can help us achieve the desired change in the outlook of the component. The if:true/if:false is useful for cases where we have a small template to hide or show based on one logical criteria. While render method is more useful when we have major changes like two different designs in same component and we intend to keep the html files separate.
Example | MyComponent.js
import { LightningElement } from 'lwc';import loginTemplate from './loginTemplate.html';import logoutTemplate from './loginTemplate.html';import renderTemplate from './menderMethod.html';
export default class MyComponent extends LightningElement {
render(){
return this.selectedOpt === 'Logging In'? loginTemplate:
this.selectedOpt === 'Logging Out'? logoutTemplate:
renderTemplate
}
handleClick(event){
this.selectedOpt = event.target.label
}}
Example | loginTemplate.html
<template>
           <h1> Logging In <h2>
</template>
Example | logoutTemplate.html
<template>
           <h1> Logging Out <h2>
</template>
Example | renderMethod.html
<template>
          <lightning-card title="Render Multiple Template" icon-name="custom:custom1">
            <h2>Choose your option</h2>

            <lightning-button
            variant="destructive"
            label="Login"
            title="Login"
            onclick={handleClick}
            class="slds-m-left_x-small"></lightning-button>

            <lightning-button
            variant="success"
            label="Logout"
            title="Logout"
            onclick={handleClick}
            class="slds-m-left_x-small"></lightning-button>

    </lightning-card>
</template>
In the above example, we are rendering different templates, login and logout based on conditional rendering with the help of render method. Based on the user input via the buttons on the renderMethod.html , we are passing value to the render method to return a reference value using ternary operators.
Conclusion: Mastering Lifecycle Hooks
The lifecycle hooks are essential for building robust, efficient components. Here’s a quick summary for you:
- constructor(): Initialization of component properties and setup that doesn’t depend on DOM.
- connectedCallback(): Fetch data or initialize logic when the component is inserted into the DOM.
- renderedCallback(): Perform DOM manipulations or actions after the component is fully rendered.
- disconnectedCallback(): Clean up resources when the component is removed from the DOM.
- errorCallback(): Handle errors that occur in child components to ensure graceful degradation.
Understanding these hooks will not only make you a more efficient developer but will also help you to write clean, modular, and scalable codes. Practicing more on these will give you proper insights for creating dynamic, data-driven applications in Salesforce.
If you have any comments/queries, shoot them down below.